Go to the Rating-Widget.com and easily setup the language, styling and layout of your thumb or star rating.

Add the Ratings to Blogger
- Click on the big “Get Widget” button.
- Then, follow the instructions to get your
unique-user-key. The reason you need one is for the system to recognize your unique Blogger account so it will show your Blogger star ratings and not others.
Btw. Don’t worry about the code window – you do not need it. - After the key generation, you’ll find the familiar “Add to Blogger” button – simply click it.
- This will forward you to Blogger’s “Add Page Element” page. Leave the title empty, and click on the “Add Widget” button.
- All what left to do is clicking on the “Save arrangement” button.
Can you believe it?! WE ARE DONE!Btw. you might notice a new gadget with “HTML/JavaScript” title. This is the Rating-Widget’s rating system code that was automatically added to your Blogger.
- Open your blog and Voilà – your Blogger posts are ready to be rated with our beautiful Rating-Widget’s thumb or star ratings.


As one of the earliest blog publishing platforms (Wiki – Blogger), Blogger keeps rapidly growing and taking a major cut of the market. Since its acquisition by Google at 2003, dozens of rating system tutorials have been published to facilitate the need. Our vision at Rating-Widget is to provide a Beautiful Rating System with Super-Simple Implementation. I believe that we finally nailed our vision into Blogger. You don’t need to have any web development skills like AJAX, jQuery and PHP. Simply design the ratings with our WYSWYG editor, and click the “Add to Blogger”.
FAQ / Troubleshooting (Updated on May 2, 2013)
I followed every step but it just don’t work?
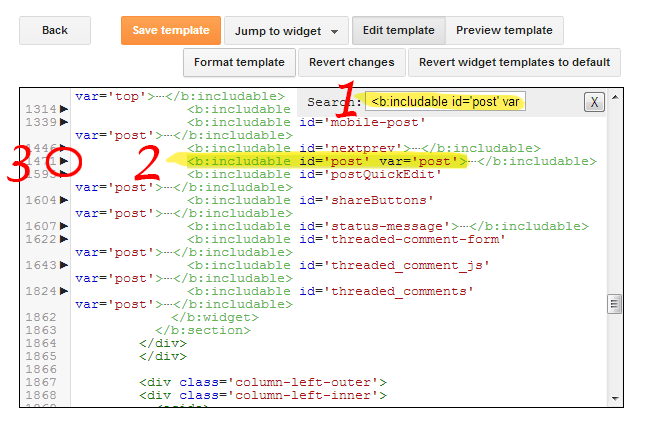
- Open your blog’s template and click on EditHtml:
- Put the mouse cursor anywhere inside the code area and click Ctrl+F to start the search functionality. Type1
<b:includableid='post'var='post'>in order to find the main post template container. - Then, expand the template by clicking the small arrow on it’s left, next to the line number and search for the meta element:1
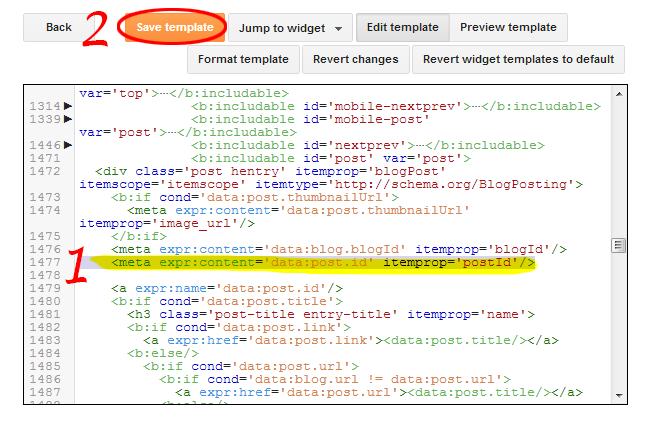
<metaexpr:content='data:post.id'itemprop='postId'/> - This meta tag is required in order to match each rating with its corresponding unique post ID, so if you can’t find it, simply add it and save the template.

0 Komentar untuk "RATING WIDGET"